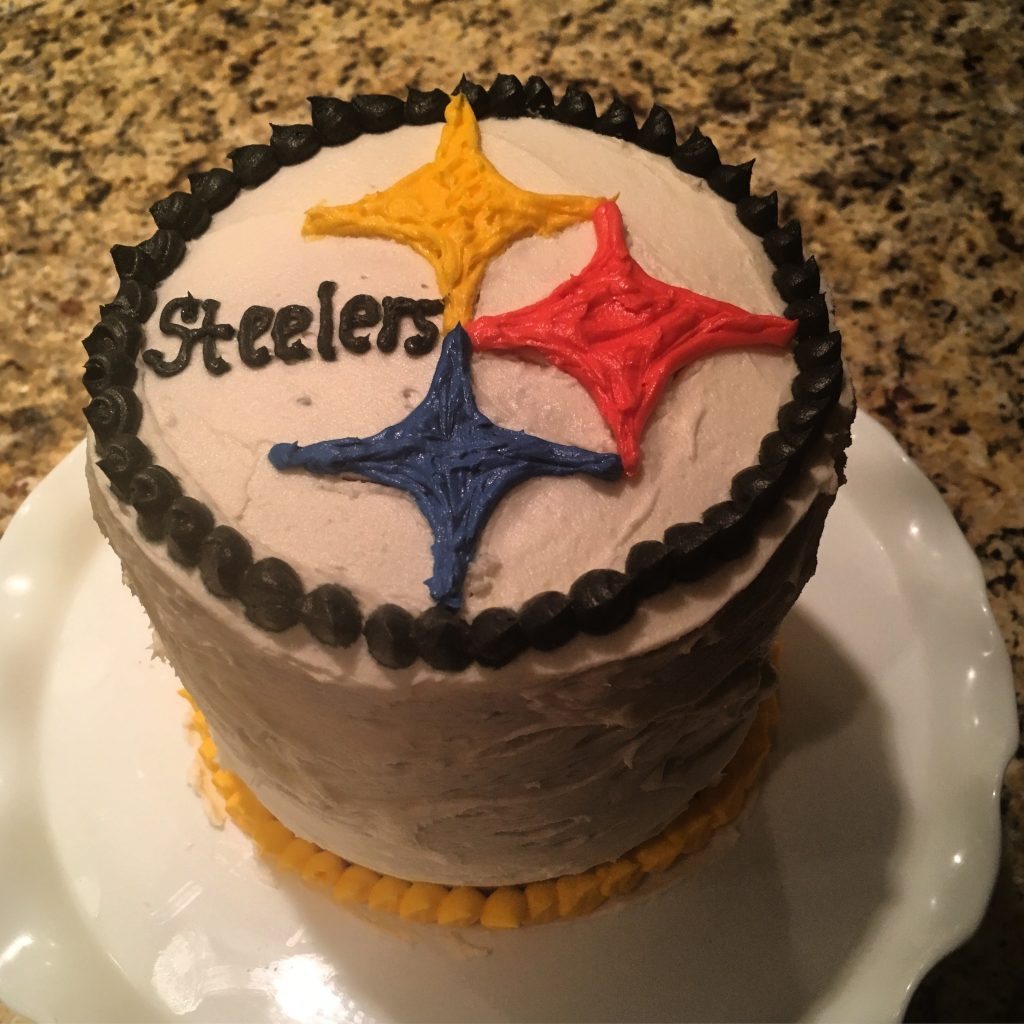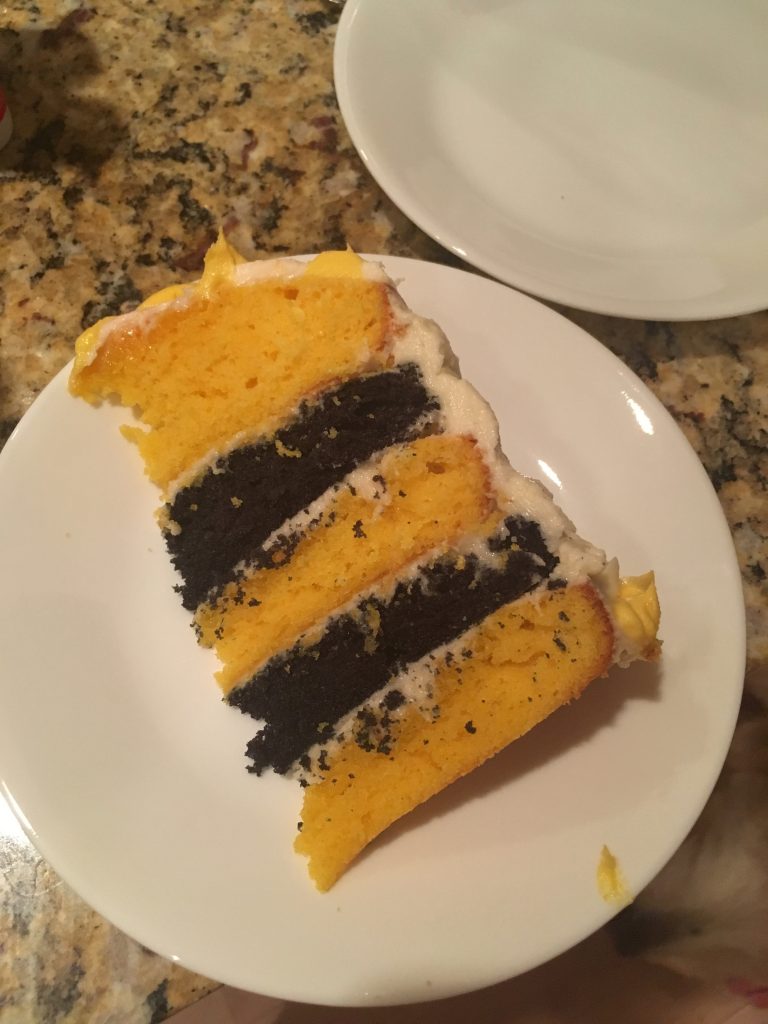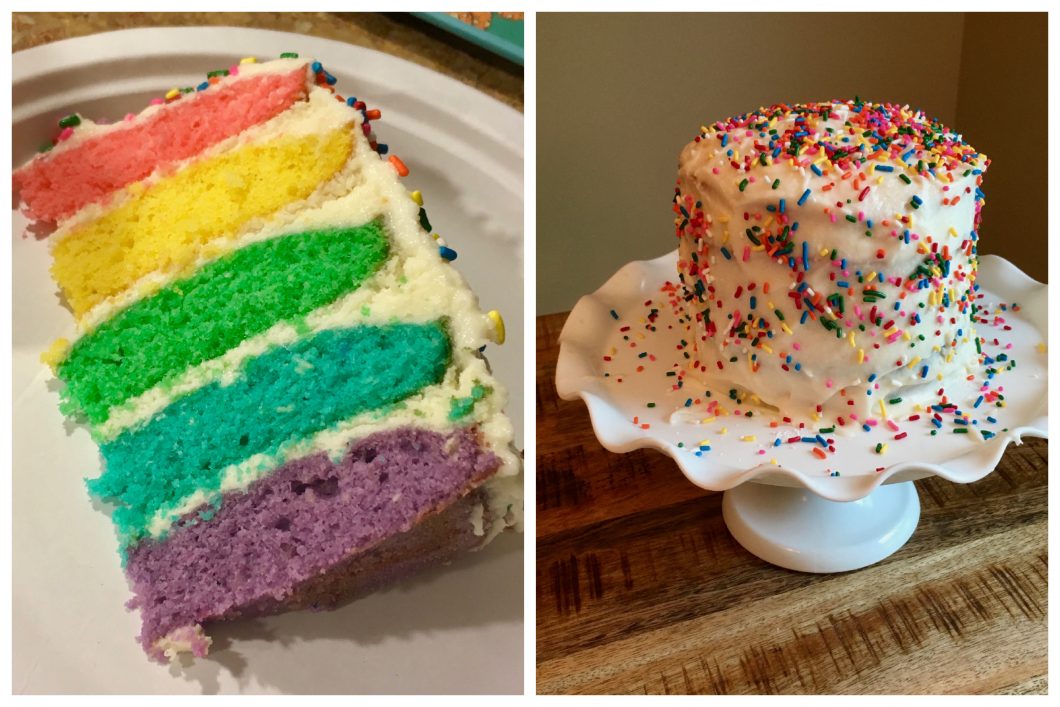
One of the most versatile desserts I’ve made is the 5-layer, 6-inch cake. With so many layers, you can have a lot of fun with color. Perhaps you’ll make a rainbow cake, or red/green for Christmas? I even make a black and gold Steelers themed cake for my dad’s birthday. While the task may seem like a lot to take on, with the right tools and a little practice, you’ll be good to bake whatever creative cake comes to mind!
Here’s what you’ll need:
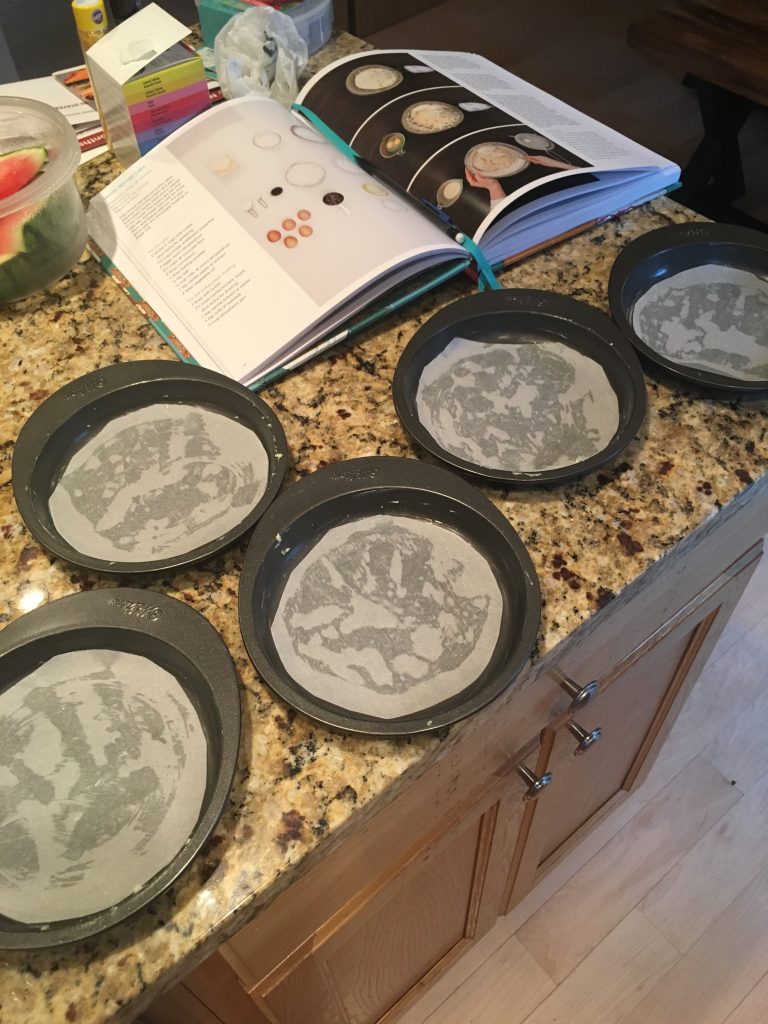
- 5 – 6 inch cake pans (mine are from Wilton)
- Vibrant colored food dye (I have this Wilton 12-pack)
- A cake recipe – get creative! Any cake recipe will do, but if you are dying the batter, stick with light colored
- Frosting recipe (I use one from chelsweets.com)
- Parchment paper
- Icing bags and tips, or ziploc bag
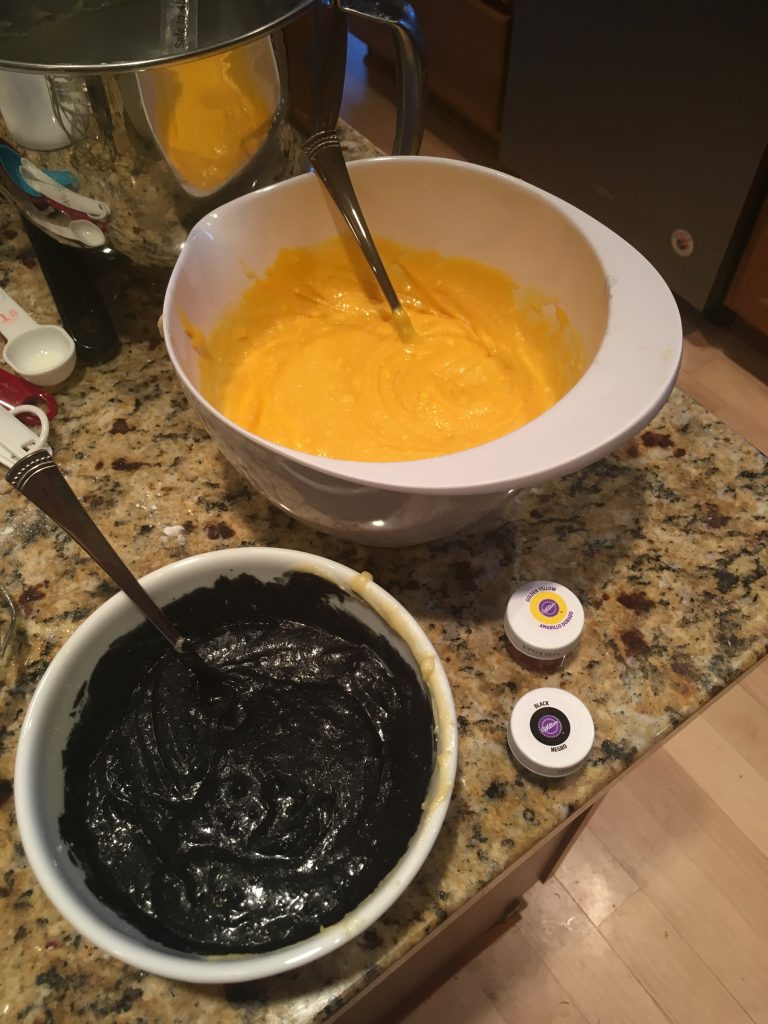 To start, make your cake batter following the recipe. In my experience, any recipe meant to cover a standard 2 – tier 9″ cake will adapt fine for this cake. If you plan to dye the layers, a cake batter lighter in color (such as a white or vanilla cake) will work best. Once the batter is mixed, separate into as many bowls as needed for the number of colors planned. For my Steelers cake, I split into two with one bowl holding slightly more batter, since I planned for 3 yellow layers and two black. Dye the batter using a food coloring gel. The drops are harder to get the vibrant color needed for the color to really show through. Next, spray and line the 5 cake pans with parchment paper. I usually just layer the parchment paper so I can cut multiple circles at the same time that are roughly the size of the bottom of the pan. It doesn’t have to be perfect! Fill the pans until they are not quite to the top and shake each one a bit to level it out. Bake at the temperature given in the recipe, but these will bake much faster, so keep an eye on the oven! After about 10 minutes or so, check the progress by seeing if the top looks slightly browned and if a toothpick comes out clean.
 While the cakes are cooling, whip up your frosting recipe! I would advise making more than you expect – we do have to frost 5-layers! When following chelsweets.com’s recipe, I make about 3/4 of what she uses (so 3 sticks of butter and 6 cups of powered sugar). If you plan to color your frosting, do that now as well.
Once the cakes have cooled, you can begin decorating! Assemble the cake on your final surface (cake plate or cake stand) as it will be hard to move after. Put down some frosting in the center so the cake will stick and lay your first cake down. The flatter part of the cake (from the bottom of the pan) should always be the bottom when assembling. If any of your cakes have a tall dome, you’ll want to shave it off with a knife. The top doesn’t have to be perfectly flat, but we at least want something for the next layer to sit atop of. You can leave one layer nicely domed for the top of your cake. Once the first layer is down, add a generous amount of frosting and spread it out. Lay the next layer and repeat until you have added all the layers. Straighten out any leaning layers as you go, so you don’t end up with a leaning cake!
Now to frost the outside! You likely have gaps in between the edges of each layer. For this, I recommend piping in extra frosting with an icing bag, or just a ziploc bag with the corner cut off. Load the bag with icing – *TIP* press the bag into a glass cup and fold the edges over the side of the glass. This will make it much easier to fill, and the edge provides a great surface for cleaning off your spatula * – and pipe it into those gaps. Then use a knife to smooth it all out. Continue to either pipe or spread icing over the outside and top of the cake. If you have extra time, completing one layer and then putting the cake in the fridge for about an hour provides a nice base coat, called a crumb coat. Frosting the remainder of the cake will be easier after!
Once the cake is frosted, decorate as desired! It’s fun to surprise friends when you cut into the cake and reveal all your layers. Enjoy!